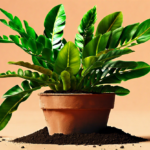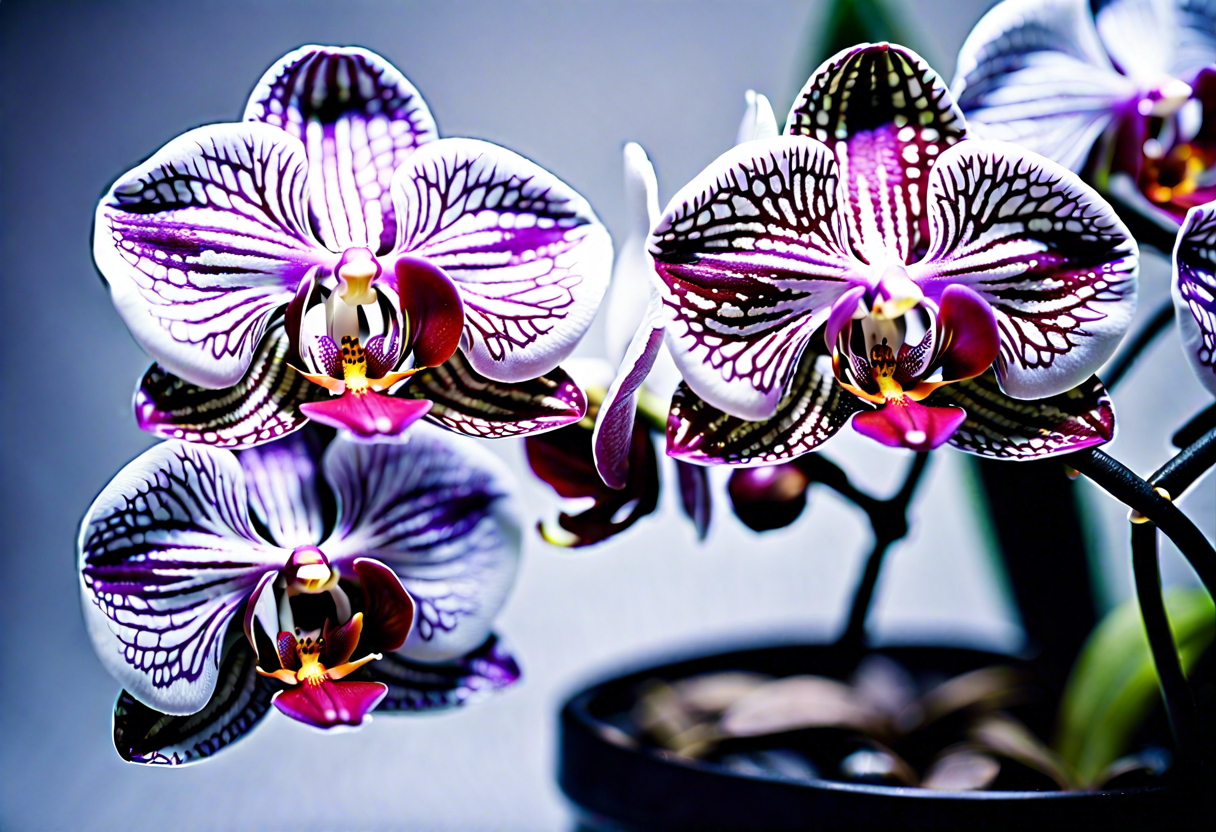
Pruning and Repotting Guide for Phalaenopsis Orchids
Introduction
Phalaenopsis orchids, also known as moth orchids, are treasured for their stunning blooms and long-lasting beauty. To keep them healthy and thriving, proper care is essential. Pruning and repotting are two important aspects of orchid care that help maintain their overall well-being. In this guide, we will explore the best practices for pruning and repotting your Phalaenopsis orchids, ensuring they continue to flourish.
Pruning Phalaenopsis Orchids
Regular pruning is crucial for promoting growth and maintaining the health of your Phalaenopsis orchids. Here are some steps to follow when pruning your orchids:
-
Remove spent flowers: After the blooms have faded, use sterilized scissors or clippers to cut the stem just above the second node from the base. This will encourage the orchid to produce new flower spikes.
-
Trim yellow or dead leaves: Any yellow or dead leaves can be trimmed back to the base of the plant. This not only improves the appearance of the orchid but also prevents the spread of diseases or pests.
-
Prune damaged or diseased roots: During repotting (discussed in the next section), inspect the roots carefully. Trim any damaged or diseased roots using clean, sharp scissors. Be sure to sterilize the scissors before and after each cut to prevent the spread of infections.
Repotting Phalaenopsis Orchids
Repotting is necessary when the orchid outgrows its current pot or the potting medium becomes old and broken down. Here’s a step-by-step guide to repotting your Phalaenopsis orchids:
-
Choose the right time: The best time to repot orchids is after they have finished blooming. This is when they are entering their growth phase and will recover quickly from the repotting process.
-
Select a new pot and potting medium: Orchids prefer a well-draining medium, such as bark or sphagnum moss. Choose a pot that allows for proper drainage and is slightly larger than the current one.
-
Carefully remove the orchid from its current pot: Gently hold the base of the plant and carefully slide it out of the pot. Avoid pulling on the leaves or stems, as this can cause damage.
-
Trim old roots and divide if necessary: If the orchid has densely packed roots, you may need to gently divide the plant into two or more sections. Trim any old, decaying roots and sterilize your tools before and after each cut.
-
Place the orchid in the new pot: Position the orchid in the center of the pot and fill in the gaps with the potting medium, ensuring the roots are adequately covered but not buried too deeply.
-
Water and care for the repotted orchid: After repotting, water the orchid thoroughly and place it in a location with bright, indirect light. Avoid direct sunlight, as it can scorch the delicate leaves. Maintain regular watering and fertilization routine to support healthy growth.
Proper pruning and repotting are essential for the care of your Phalaenopsis orchids. Regular pruning ensures the orchids stay healthy and vigorous, while repotting provides them with fresh growing medium and space to thrive. By following these guidelines, you can enjoy the beauty of your Phalaenopsis orchids for years to come. Remember to always use clean tools and provide the optimal growing conditions for these stunning plants.
Proper Watering Techniques for Phalaenopsis Orchids
Phalaenopsis orchids, also known as moth orchids, are beloved for their stunning flowers and graceful appearance. To ensure their health and longevity, it is crucial to provide them with proper watering. Here are some essential care instructions for watering your Phalaenopsis orchids.
1. Water Quality: The quality of water you use can significantly impact the health of your orchids. It is best to use filtered or distilled water to prevent any harmful chemicals or minerals from affecting the delicate roots of the orchids. Avoid using softened or chlorinated water as they can damage the roots.
2. Frequency: Finding the right watering frequency is vital for Phalaenopsis orchids. As a general rule, water your orchids every 7 to 10 days during the active growing season. In colder months or when the orchid is not actively growing, you can reduce the frequency to every 10 to 14 days.
3. Watering Method: The most effective way to water Phalaenopsis orchids is to do so from below. Fill a container or tray with water and place the orchid pot in it for about 15 to 30 minutes. This allows the roots to absorb water gradually. After the soaking period, remove the orchid from the water and allow any excess to drain away.
4. Drainage: Proper drainage is essential to prevent water from accumulating around the roots and causing rot. Ensure that the orchid pot has drain holes at the bottom to allow excess water to escape. Avoid letting the orchid sit in standing water, as this can lead to root rot and other complications.
5. Mist sparingly: Some orchid enthusiasts recommend misting the leaves of Phalaenopsis orchids to increase humidity. While this can be beneficial, it should be done sparingly to avoid excessive moisture on the leaves, which can promote fungal growth. Misting once or twice a week is sufficient.
6. Watch for signs: Pay attention to your orchid’s leaves and roots to determine whether they need watering. If the roots appear silvery-gray or have a dry, shriveled appearance, it’s time to water. Similarly, if the leaves become wrinkled or the orchid appears wilted, it may be thirsty.
7. Avoid overwatering: Overwatering is one of the most common mistakes in orchid care. Orchids are more likely to survive underwatering than overwatering. To prevent this, allow the potting medium to dry out slightly between watering sessions. Check the moisture levels by sticking your finger about an inch into the potting mix and feeling for dampness.
8. Adjusting for environmental factors: Environmental conditions such as temperature, humidity, and airflow can affect the watering requirements of your Phalaenopsis orchids. In warmer or drier environments, you may need to water more frequently, while cooler and more humid settings may require less frequent watering. Observe your orchids closely and make adjustments accordingly.
By following these proper watering techniques, your Phalaenopsis orchids will thrive and reward you with their vibrant blooms. Remember that consistency and observation are key in maintaining the health and beauty of these elegant plants. Happy orchid growing!
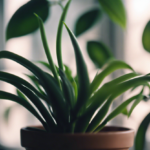
Creating the Ideal Lighting Conditions for Phalaenopsis Orchids
Proper lighting is essential for the healthy growth and blooming of Phalaenopsis orchids. These stunning plants require the right amount and quality of light to thrive. In this guide, we will explore the ideal lighting conditions for Phalaenopsis orchids and how to provide them with the best possible environment.
Phalaenopsis orchids are native to shaded tropical forests, where they receive filtered light through the canopy. Mimicking this light condition is crucial for their well-being. Bright, indirect light is preferred by these orchids, as direct sunlight can scorch their delicate leaves.
To create the optimal lighting conditions for your Phalaenopsis orchids, place them near a north or east-facing window. These orientations receive bright, indirect light without the intensity of direct sun exposure. If you don’t have a suitable window, you can also use artificial lighting, such as fluorescent or LED grow lights. Position the lights about 12-16 inches above the plants and provide them with 12-14 hours of light per day.
It’s important to note that the intensity and duration of light required may vary depending on the specific variety and environment in which the orchids are grown. Observing the plants closely can help determine if they are receiving adequate light. If the leaves appear dark green and elongated, it is a sign that they are not getting enough light. On the other hand, if the leaves turn yellow or reddish, it may be an indication of too much sunlight.
In addition to the amount of light, the quality of light is also crucial for Phalaenopsis orchids. They thrive in light with a color temperature around 6000-6500 Kelvin, which resembles natural daylight. This color temperature can be achieved with cool white fluorescent lights or full-spectrum LED lights. Avoid using incandescent bulbs, as they emit too much heat and can damage the plants.
While providing the ideal lighting conditions is essential, it’s equally important to avoid sudden changes in light exposure. Orchids are sensitive to fluctuations and prefer a consistent lighting environment. Avoid placing them near drafts, heaters, or air conditioning vents, as these can cause temperature and light changes that can harm the plants.
Creating the ideal lighting conditions for Phalaenopsis orchids involves providing bright, indirect light with a color temperature around 6000-6500 Kelvin. Position the orchids near a north or east-facing window or use artificial lighting if necessary. Avoid direct sunlight and sudden light changes to ensure the health and vitality of your Phalaenopsis orchids.
Fertilizing Tips to Promote Healthy Growth in Phalaenopsis Orchids
Phalaenopsis orchids are admired for their stunning blooms and elegant appearance. To ensure that these exquisite plants thrive and reach their full potential, proper fertilization is essential. By providing the right nutrients, you can promote healthy growth and vibrant flowers in your Phalaenopsis orchids. Here are some useful fertilizing tips to help you achieve success:
Choose a Well-Balanced Orchid Fertilizer: When selecting a fertilizer for your Phalaenopsis orchids, opt for a well-balanced formula specifically designed for orchids. Look for a fertilizer with a ratio such as 20-20-20 or 12-12-12, which indicates the relative proportions of nitrogen, phosphorus, and potassium. These macronutrients are essential for overall plant health and growth.
Follow a Regular Fertilizing Schedule: Phalaenopsis orchids benefit from regular fertilizing, but it’s crucial to avoid overfeeding, as this can lead to salt buildup and root damage. As a general guideline, fertilize your orchids every two weeks during the growing season, which typically spans from spring to fall. During the winter months, when the plant enters a resting phase, reduce the frequency to once a month.
Avoid Excessive Use of Fertilizer: Overfertilizing can be detrimental to Phalaenopsis orchids. Excessive fertilizer can burn the roots and cause leaf damage. Follow the package instructions carefully and use the recommended amount of fertilizer. Remember, orchids are sensitive to salts, so err on the side of caution and dilute the fertilizer to half or quarter strength.
Apply Fertilizer Diluted in Water: When applying fertilizer, it’s essential to dilute it in water. Mix the fertilizer according to the package instructions and water your orchids with the solution. Avoid applying the fertilizer directly onto the leaves or flowers, as this can cause scorching. Instead, focus on the potting media and allow the roots to absorb the nutrients.
Monitor Orchid Response: Pay close attention to how your Phalaenopsis orchids respond to fertilization. If you notice excessive leaf growth or a decline in flowering, adjust the fertilizer concentration accordingly. Orchids are adaptable plants, and their nutritional needs may vary depending on environmental factors such as light intensity and temperature.
Flush the Potting Media Occasionally: Over time, salts can accumulate in the potting media, hindering nutrient absorption. To prevent this buildup, periodically flush the potting media by thoroughly watering with plain water. This process helps to remove any accumulated salts and ensures that your orchids receive the nutrients they need.
Keep an Eye on the Growing Medium: Phalaenopsis orchids are commonly grown in a mix of bark, sphagnum moss, or other porous materials. As the growing medium decomposes over time, it loses its ability to retain nutrients. Therefore, you may need to repot your orchids every one to two years to provide fresh growing medium and replenish the nutrient supply.
These fertilizing tips into your care routine will help you achieve healthy and robust Phalaenopsis orchids. Remember to follow a consistent fertilizing schedule while being mindful of the appropriate concentration and application method. By nourishing your orchids with the right balance of nutrients, you can enjoy a spectacular display of blooms year after year.
Preventing and Treating Common Pests and Diseases in Phalaenopsis Orchids
Phalaenopsis orchids, also known as moth orchids, are loved for their exquisite blooms and ability to thrive indoors. However, like all plants, they are susceptible to pests and diseases that can hinder their growth and overall health. To keep your Phalaenopsis orchids vibrant and pest-free, it’s important to be aware of the common issues that can arise and know how to prevent and treat them effectively.
1. Aphids: These tiny insects can quickly multiply and cause extensive damage to your orchids. To prevent an infestation, regularly inspect your plants for signs of aphids, such as curled leaves, sticky residue, and distorted growth. If you spot any aphids, isolate the affected plant and remove the pests by gently wiping them away with a damp cloth or using a strong spray of water. In severe cases, consider using an organic insecticidal soap.
2. Spider mites: These microscopic pests can cause significant damage to your orchids by sucking out the sap from the leaves, leading to discoloration and stunted growth. Increase humidity around your orchids by placing them on a tray of water or using a humidifier to discourage spider mites. If an infestation occurs, wash your orchids with a mild soap and water solution or consider using a miticide specifically formulated for orchids.
3. Mealybugs: Mealybugs are small, cottony insects that commonly infest Phalaenopsis orchids. They feed on plant sap and can cause yellowing, wilting, and distorted growth. To prevent mealybug infestations, regularly inspect your orchids and remove any visible bugs or egg masses with a cotton swab dipped in rubbing alcohol. In severe cases, consider using an insecticidal soap or horticultural oil.
4. Fungal and bacterial diseases: Phalaenopsis orchids are susceptible to various fungal and bacterial diseases, such as root rot, black rot, and bacterial leaf spot. To prevent these diseases, ensure proper air circulation around the roots and leaves of your orchids by using a well-draining potting mix and placing the plants in an area with good ventilation. Avoid overwatering and remove any infected parts promptly. If necessary, treat with a fungicide or bactericide specifically formulated for orchids.
5. Viral diseases: Unfortunately, there are no cures for viral diseases in orchids. Prevention is key when it comes to viral diseases. Avoid using contaminated tools and follow good sanitation practices, such as disinfecting your pruning shears between plants. If you suspect a viral infection, it’s best to remove and destroy the infected plant to prevent the spread of the disease to other orchids.
By being vigilant and proactive in caring for your Phalaenopsis orchids, you can prevent and treat common pests and diseases effectively. Regularly inspect your plants, provide them with optimal growing conditions, and promptly address any issues that arise. With proper care and attention, your Phalaenopsis orchids will thrive and reward you with their stunning blooms for years to come.
Conclusion
By following the care instructions for Phalaenopsis orchids highlighted in this article, you can ensure that your plants thrive and bloom beautifully. Pruning and repotting are essential tasks that should be carried out periodically to maintain the health and longevity of your orchids. Pruning helps remove dead or damaged parts, while repotting allows for proper root growth and aeration.
Proper watering techniques are crucial for Phalaenopsis orchids, as they require a balanced approach. Overwatering can lead to root rot, while underwatering can result in dehydration. It is recommended to water the orchids thoroughly and then allow the roots to dry slightly between waterings. Creating a well-draining potting medium and using a pot with drainage holes can help prevent waterlogging.
The ideal lighting conditions for Phalaenopsis orchids involve providing them with bright, indirect light. Placing them near an east or west-facing window is usually ideal, as it provides them with sufficient light without exposing them to direct sunlight, which can cause sunburn. If natural light isn’t available, you can supplement it with fluorescent grow lights to ensure their growth and development.
Fertilizing Phalaenopsis orchids is essential to promote healthy growth and vibrant blooms. Using a balanced orchid fertilizer with proper ratios of nitrogen, phosphorus, and potassium can provide the necessary nutrients for their optimal development. However, it’s crucial to follow the instructions on the fertilizer packaging and avoid overfertilizing, as it can lead to salt buildup in the potting medium.
Preventing and treating common pests and diseases is crucial for maintaining the health of Phalaenopsis orchids. Regularly inspecting the plants for signs of pests such as aphids, mealybugs, or scale insects and taking immediate action if infestations are detected can help prevent further damage. Applying organic insecticides or using natural pest control methods, like neem oil, can effectively manage these pests. Additionally, practicing good hygiene, such as disinfecting tools and avoiding overcrowding of plants, can minimize the risk of diseases.
Caring for Phalaenopsis orchids requires attention to detail and adherence to specific care instructions. Pruning, repotting, proper watering, providing adequate lighting, fertilizing appropriately, and preventing pests and diseases are all vital components of maintaining healthy and thriving orchids. By implementing these care techniques, you can enjoy the beauty and elegance of these magnificent flowering plants for years to come.