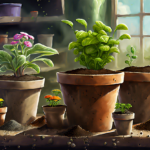
Understanding the Different Types of Orchids
Orchids are a diverse and fascinating group of plants that come in a wide range of shapes, colors, and sizes. With over 25,000 known species, orchids are found in almost every corner of the world. Understanding the different types of orchids is essential for their successful care and cultivation.
-
Epiphytic Orchids: These orchids are the most common variety and are typically found growing on trees or rocks in their natural habitats. Epiphytic orchids have aerial roots that absorb moisture and nutrients from the air. Popular examples of epiphytic orchids include Phalaenopsis (Moth Orchids), Dendrobiums, and Oncidiums.
-
Terrestrial Orchids: Unlike epiphytic orchids, terrestrial orchids grow in the ground and derive their nutrients from the soil. These orchids are found in diverse habitats like grasslands, forests, and meadows. Cymbidiums, Calanthe, and Paphiopedilums are common examples of terrestrial orchids.
-
Lithophytic Orchids: Lithophytic orchids are adept at growing on rocks or stones. They have specialized clinging roots that anchor them securely to their rocky habitats. Examples of lithophytic orchids include some species of Dendrobium and Phalaenopsis.
-
Saprophytic Orchids: These orchids have unique adaptations that allow them to derive their nutrients from decaying organic matter. Saprophytic orchids lack chlorophyll and are usually found on the forest floor or in decaying logs. Examples of saprophytic orchids include the Ghost Orchid and the Bird’s Nest Orchid.
-
Miniature Orchids: As the name suggests, miniature orchids are smaller in size compared to other orchid varieties. These charming orchids are perfect for those with limited space or for collectors looking to add diversity to their collection. Miniature orchids come in various types and can be either epiphytic or terrestrial.
Understanding the different types of orchids is crucial for their care and cultivation. Each type has its own unique requirements when it comes to light, water, and temperature. By identifying the type of orchid you have, you can better provide the optimal conditions for its growth and blooming. Whether you have an epiphytic Phalaenopsis or a terrestrial Cymbidium, knowing the specific needs of your orchid will go a long way in ensuring its health and vibrancy.
Tips for Watering and Fertilizing Orchids
When it comes to taking care of orchids, proper watering and fertilization are essential for their health and growth. Orchids have unique needs, and understanding how to meet those needs will help ensure that they thrive in your care. Here are some essential tips for watering and fertilizing orchids:
Watering Orchids
One of the most common mistakes people make with orchids is overwatering. Orchids are epiphytic plants, which means they naturally grow on tree branches, with their roots exposed to air and moisture. This unique adaptation makes them susceptible to root rot if their roots remain constantly wet. To avoid overwatering, it’s important to let the potting medium dry out between waterings. Typically, this means watering once a week, but it might need to be adjusted depending on the specific orchid species and environmental conditions.
When watering your orchids, it’s crucial to water the roots and not the leaves. Moisture sitting on the leaves can lead to bacterial and fungal infections, which can harm the plant. Use room temperature water and aim to water early in the day to ensure that any excess moisture evaporates before evening.
Fertilizing Orchids
Orchids have specific nutrient requirements, and regular fertilization is necessary to keep them healthy and promote blooming. When selecting a fertilizer for your orchids, choose a balanced formula specifically formulated for orchids. These fertilizers typically have a higher nitrogen content to encourage lush foliage growth. Avoid using fertilizers with a high concentration of phosphorus, as this can cause salt buildup in the potting medium.
During the active growth period, which is usually from spring to early fall, fertilize your orchids every two weeks. During the rest period, typically in winter, you can reduce fertilization to once a month. Always follow the instructions provided on the fertilizer package, as different products may have different application rates.
When applying fertilizer, it’s essential to dilute it to avoid burning the orchid’s delicate roots. A good rule of thumb is to use half the recommended strength. You can also apply the fertilizer after watering, as the moist roots can better absorb the nutrients.
Remember, orchids are sensitive to mineral buildup, so it’s crucial to flush the potting medium with fresh water regularly. This will help prevent salt accumulation and ensure that your orchids receive the right balance of nutrients.
By carefully monitoring the watering and fertilization of your orchids, you can help create the ideal growing conditions for these beautiful plants. Remember to observe your orchids closely and make adjustments as needed to meet their individual needs. With proper care and attention, your orchids will reward you with stunning blooms year after year.
Maintaining Ideal Temperature and Humidity Levels for Orchids
Orchids are known for their exquisite beauty and are highly prized by plant enthusiasts. However, these delicate plants require specific conditions to thrive. One crucial aspect of orchid care is maintaining the ideal temperature and humidity levels.
Temperature plays a vital role in the growth and blooming of orchids. Most orchids prefer a temperature range between 60 to 80 degrees Fahrenheit (15 to 27 degrees Celsius) during the day, with a slight drop at night. It’s important to avoid extreme temperature fluctuations, as they can stress the plants and hinder their growth. To ensure consistent temperatures, keep your orchids away from drafts or heating/cooling vents.
Humidity levels also significantly impact orchid health. Orchids are native to tropical regions where humidity levels can be quite high. To replicate these conditions, aim for a humidity level around 50 to 70 percent. You can increase humidity by using a humidifier, placing a tray of water near the orchids, or grouping them together. Misting the leaves with water can also help, but avoid wetting the flowers or buds, as it can cause them to rot.
To monitor temperature and humidity, consider using a digital thermometer and hygrometer. These devices will provide accurate readings, allowing you to make necessary adjustments to create an optimal environment for your orchids. Additionally, certain orchid species may have specific temperature and humidity requirements, so it’s essential to research and cater to their needs accordingly.
Another factor to consider is proper air circulation. While orchids enjoy high humidity, stagnant air can lead to fungal and bacterial growth. To promote air circulation, place a small fan nearby to gently stir the air without creating strong drafts.
In addition to temperature and humidity, light is also crucial for orchids. Most orchids require bright, indirect light to thrive. Avoid placing them in direct sunlight, as it can scorch their leaves and damage the delicate flowers. East or west-facing windows are often ideal, as they provide the right balance of light intensity. If natural light is insufficient, you can supplement it with artificial lighting, such as fluorescent or LED grow lights.
By maintaining the appropriate temperature, humidity, and light levels, you can create an ideal environment for your orchids to thrive. Remember to regularly monitor these conditions and make adjustments as needed. With proper care, your orchids will reward you with stunning blooms and bring joy to your indoor garden.
Preventing and Treating Common Orchid Pests and Diseases
Orchids are known for their beauty and elegance, but like any other plant, they can be susceptible to pests and diseases. However, with proper care and preventive measures, you can ensure that your orchids stay healthy and free from these common issues.
1. Identify the Problem: The first step in preventing and treating pests and diseases in orchids is to identify the problem. Common pests that afflict orchids include aphids, mealybugs, scale insects, and spider mites. These pests can cause damage to the leaves, flowers, and stems of the orchids. Diseases such as root rot, fungal infection, and bacterial rot can also occur if the orchids are not cared for properly.
2. Maintain Good Hygiene: One of the most effective ways to prevent pests and diseases in orchids is by maintaining good hygiene. Clean your orchid pots and tools regularly to prevent the buildup of harmful pathogens. Remove any dead or decaying plant material to reduce the risk of fungal or bacterial infections.
3. Provide Adequate Air Circulation: Proper air circulation is crucial for preventing pests and diseases in orchids. Orchids thrive in well-ventilated areas with good airflow. Avoid overcrowding your orchid collection and ensure that there is enough space between plants to facilitate air circulation. This will help prevent the spread of diseases and discourage pests from settling on the plants.
4. Water Properly: Overwatering is a common mistake that can lead to root rot and other fungal infections in orchids. It is essential to water your orchids properly, allowing the roots to dry out between waterings. Use well-draining potting mix and avoid leaving the plant sitting in water for extended periods.
5. Monitor and Inspect: Regular monitoring and inspection of your orchids can help detect any signs of pests or diseases early on. Check the leaves, stems, and roots for any abnormalities such as discoloration, spots, or pests. If you notice any issues, take prompt action to prevent further spread and treat the problem effectively.
6. Use Natural Pest Control Methods: If you do encounter pests on your orchids, try using natural pest control methods before resorting to harsh chemicals. For instance, introducing beneficial insects like ladybugs or using neem oil can help control aphids and other small pests. Additionally, regularly cleaning the leaves with a gentle insecticidal soap solution can help keep the pests at bay.
7. Seek Professional Help: If you are unsure about how to treat a particular pest or disease, don’t hesitate to seek professional help. Local garden centers and orchid societies often have experts who can provide guidance and recommend suitable treatments.
By following these preventive measures and promptly treating any issues that arise, you can ensure that your orchids remain healthy and pest-free. Remember, prevention is always better than cure when it comes to caring for your precious orchid collection.
Orchid Repotting and Dividing Techniques for Better Growth and Blooming
Repotting and dividing orchids are essential techniques that can help promote better growth and blooming. Orchids, like other plants, eventually outgrow their containers or clumps and need to be repotted or divided to maintain their health and vitality. Here are some key tips to guide you through the process:
Knowing When to Repot or Divide Orchids
It’s important to recognize the signs that indicate when your orchid needs to be repotted or divided. These signs include:
- The potting medium breaking down or becoming compacted
- The orchid outgrowing its current container, with roots circling densely around the edges
- Poor drainage, leading to root rot
- Lack of blooming or stunted growth despite proper care
By being attentive to these indicators, you can ensure that your orchids stay healthy and vibrant.
Repotting Orchids
When repotting orchids, it’s essential to choose the right potting mix. Orchids typically prefer a loose, well-draining medium that retains moisture while allowing air circulation around the roots. Popular choices include sphagnum moss, orchid bark, or a combination of both.
Before repotting, carefully remove the orchid from its current container and gently loosen the roots. Trim any dead or rotting roots with sterilized pruning shears. Place the orchid in its new pot, ensuring that the roots are adequately covered and supported by the fresh potting mix. Be careful not to bury the orchid too deep, as this can suffocate the roots.
Dividing Orchids
Dividing orchids is a technique used when the plant has outgrown its container or when you want to propagate new plants. This process involves separating the orchid into smaller sections, each with its own set of roots and growth points.
To divide an orchid, carefully remove it from its pot and gently separate the clumps into individual sections. Ensure that each division has at least three healthy pseudobulbs and a sufficient root system to support growth. Trim any damaged or dead roots before replanting the divisions in fresh potting mix.
Aftercare
After repotting or dividing your orchid, proper aftercare is crucial. Provide the newly potted orchid with adequate light, humidity, and proper watering. It’s essential not to overwater the orchid during its recovery period, as this can lead to root rot. Monitor the plant closely and adjust your care routine as needed.
With time, patience, and proper care, your repotted or divided orchids will recover and thrive. These techniques will help ensure that your orchids continue to produce beautiful blooms and remain healthy for years to come.
Conclusion
Taking care of orchids requires a combination of knowledge and skills to ensure their optimal growth and blooming. Understanding the different types of orchids is vital as it allows you to provide specific care tailored to each species. Additionally, mastering the art of watering and fertilizing orchids is crucial for maintaining their health. Remember to water your orchids thoroughly but with care, allowing the roots to dry out slightly between waterings. As for fertilization, using a balanced orchid fertilizer at the right frequency is key to providing the necessary nutrients for robust growth.
Maintaining the ideal temperature and humidity levels is also essential for orchids’ well-being. Most orchid species thrive in warm and humid conditions, so it is crucial to provide adequate ventilation and air circulation. Additionally, consider investing in a humidity tray or using a humidifier to create the ideal microclimate for your orchids. Proper temperature control will ensure that your orchids remain in their comfort zone, promoting healthy growth and vibrant blooms.
One of the challenges that orchid enthusiasts may face is preventing and treating common pests and diseases. Regularly inspect your orchids for signs of pests such as aphids, mealybugs, or spider mites. If detected, take immediate action using non-toxic methods or appropriate insecticides to eradicate them. It is advisable to isolate infected plants to prevent the spread of pests or diseases. Moreover, maintaining good cultural practices, including clean tools and proper sterilization techniques, can help prevent the occurrence of diseases.
Orchid repotting and dividing techniques contribute to better growth and blooming. Repotting should be done when the potting medium breaks down or when the orchid outgrows its current container. Gently remove the orchid from its pot, trim any damaged or dead roots, and repot it in fresh orchid potting mix. Dividing orchids helps rejuvenate plants and encourages the development of new growth and more frequent blooming. Divide orchids when they have become crowded, ensuring that each divided section has healthy roots and at least one pseudobulb or growth.
Taking care of orchids requires a comprehensive approach that encompasses understanding the different types of orchids, mastering watering and fertilizing techniques, maintaining ideal temperature and humidity levels, preventing pests and diseases, and practicing repotting and dividing techniques. By following these essential tips and techniques, you can enjoy the beauty and elegance of orchids in a flourishing and vibrant state year after year.